


Verdict: 70mai Dash Cam Omni X200
Our editorial rating is based on product testing.
- attractive, modern, and unconventional design
- excellent image quality with FullHD resolution and 60 fps
- the ability to rotate almost 360° around its axis
- voice control is very effective and easy
- built-in GPS
- unstable 70mai app (dropping WiFi and occasional issues loading the main menu)
- parking-mode monitoring doesn’t work well enough
- to use some features, you need to connect via an HW kit, which is sold separately
Many drivers feel better when their vehicle is monitored by a camera that also records the whole trip in case of an accident. One of them is the 70mai Dash Cam Omni X200, which we tested in detail. Besides its modern, stylish design, it also brings AI features and 360° rotation.
In the review, we’ll show you how to install this type of dash cam, then we’ll focus on image quality in different conditions—while also covering control, the app, and the available settings.
Where to buy the 70mai Dash Cam Omni?
We received the 70mai Dash Cam Omni camera for review from the manufacturer’s official store on AliExpress. This is where you can buy the camera for the best price on the market, and it’s often available in a European warehouse as well. Right now, you can find the current coupons in our article:
Current coupons for the 70mai Dash Cam Omni camera
Technical specifications
| Model | 70mai Dash Cam Omni X200 |
|---|---|
| Dimensions | 51.5 x 51.5 x 93.2 mm |
| Display size | 1.2" |
| Display technology | IPS |
| Display resolution | 240 x 240 px |
| Video resolution | 1920 x 1080 px |
| Image sensor | OS02K10 |
| Aperture | f/1.5 |
| Frames per second | 30 / 60 fps |
| Frequency | 50 / 55 / 60 Hz |
| Camera field of view angle | 140° |
| Processor | NT96580 |
| Battery | 300 mAh |
| Built-in GPS module | yes |
Packaging contents & quality
We received the 70mai Dash Cam Omni camera in a slightly crushed cardboard box. Inside, there was a product box wrapped in bubble wrap and also packed in a plastic sleeve.

The packaging protection against damage during shipping is very good. However, there was no padding in the box, so the outer box suffered some damage and was slightly deformed.


The package includes the camera itself in a very unusual design. There’s also a 3.5 m cable, a car charger for connecting to power, a small plastic lever to route the cable in your car, a pair of transparent anti-static stickers, and a spare circular sticker.

We also got a so-called hardware kit for the camera, consisting of just one cable. It’s used to unlock some monitoring features. This cable is also 3.5 m long.
Modern design
The 70mai Dash Cam Omni car camera has a very unusual yet modern design, clearly targeting especially younger customers. We chose a white-and-red color combination, but a standard black version is also available.
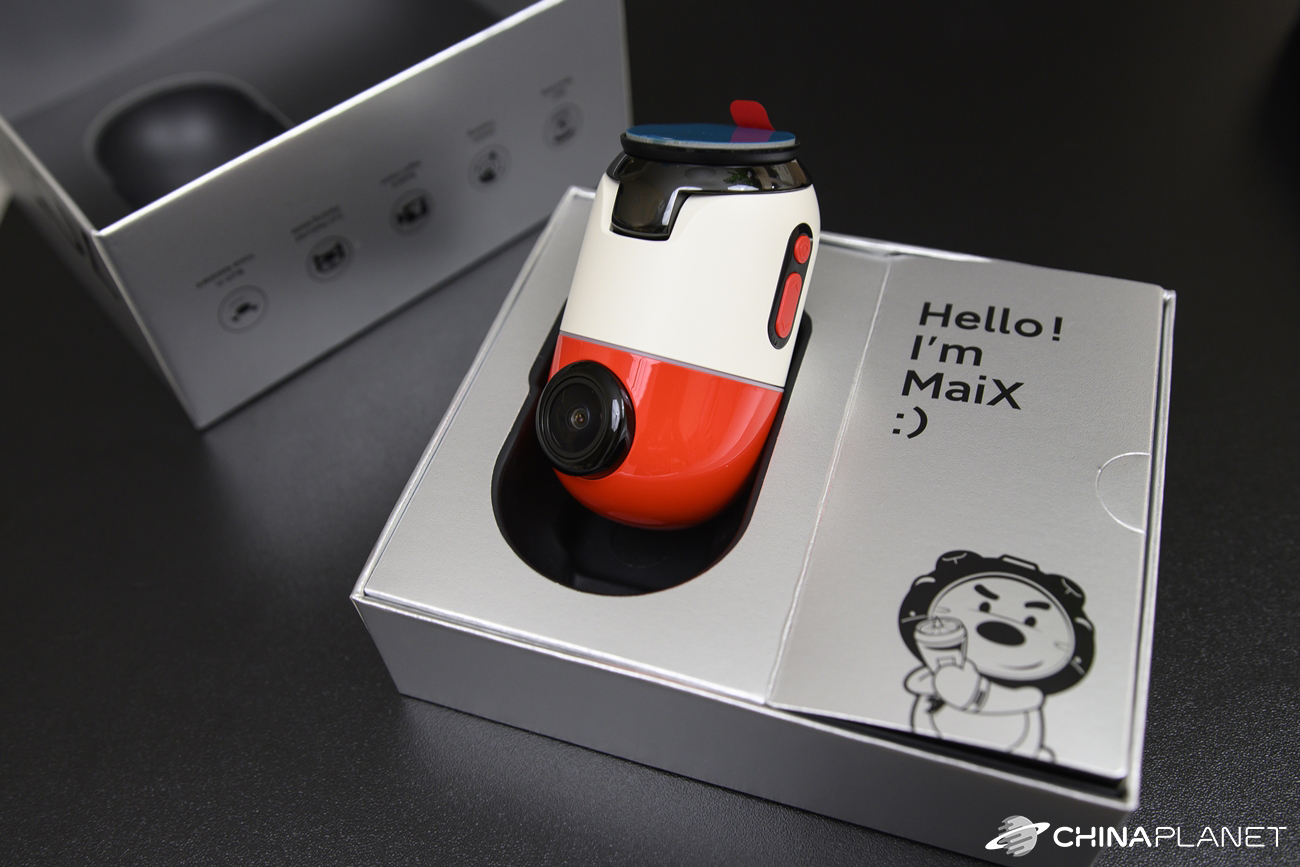
Unlike most regular car cameras, the 70mai Dash Cam Omni has a pill-like shape. The lower part, which in our case is red, is rotatable and houses a front-facing lens that completes the speaker at the very bottom.

At the junction between the individual parts, there’s a thin backlit strip that signals different camera states. The top section is home to the 1.2″ square-shaped display, the microphone, the USB-C port, and a trio of rubberized buttons.

On top of this camera, there’s a kind of mount that includes an adhesive strip with the option to remove it by simply twisting. That way, even after installation, you can disconnect the camera at any time and take it out of the car without having to peel it off.
Car installation
As we mentioned above, the camera box includes everything you need to mount it in your car. We’ve been using the 70mai Dash Cam Pro for a few years, so connecting it is nothing new for us. However, this model features an older micro USB port, so to successfully connect the new one, we had to run a new cable.

Let’s start from the very beginning. The key to installation is choosing the right spot for the camera. The recommended placement is behind the center rear-view mirror on the windshield or on one of the sides next to it. Since we don’t have much space behind the mirror, we placed the camera next to it, on the passenger side.

The first step is to apply the transparent anti-static film to the windshield. Next, the camera mount is stuck onto this film—ideally in the marked circular area. The mentioned camera mount includes a sticker that you can also find in the extra package. The same is true for the film, so if you don’t manage to stick the camera correctly, you still get one more try.

We recommend, however, being careful and trying to place the camera as straight as possible right on the first attempt. Since the windshield has a certain angle, you can tilt the camera so it stays level. Then it’s enough to connect one end of the cable to the camera and the other to the car charger. It has two USB ports.

As for the cable, you can tuck it in the car into the gaps between the various inner upholstery panels or plastic supports, and behind the rubber trim in the door frame. For easier handling, the box includes a plastic installation lever.

First power-on and pairing with a smartphone
Since the camera itself has a fairly simple menu, for most settings we need an app. It has the same name—70mai—and you can find it in the Play Store. The app can search for the camera via Bluetooth as long as it’s nearby your smartphone. Pairing is then confirmed by pressing the power button (on/off) on the camera.
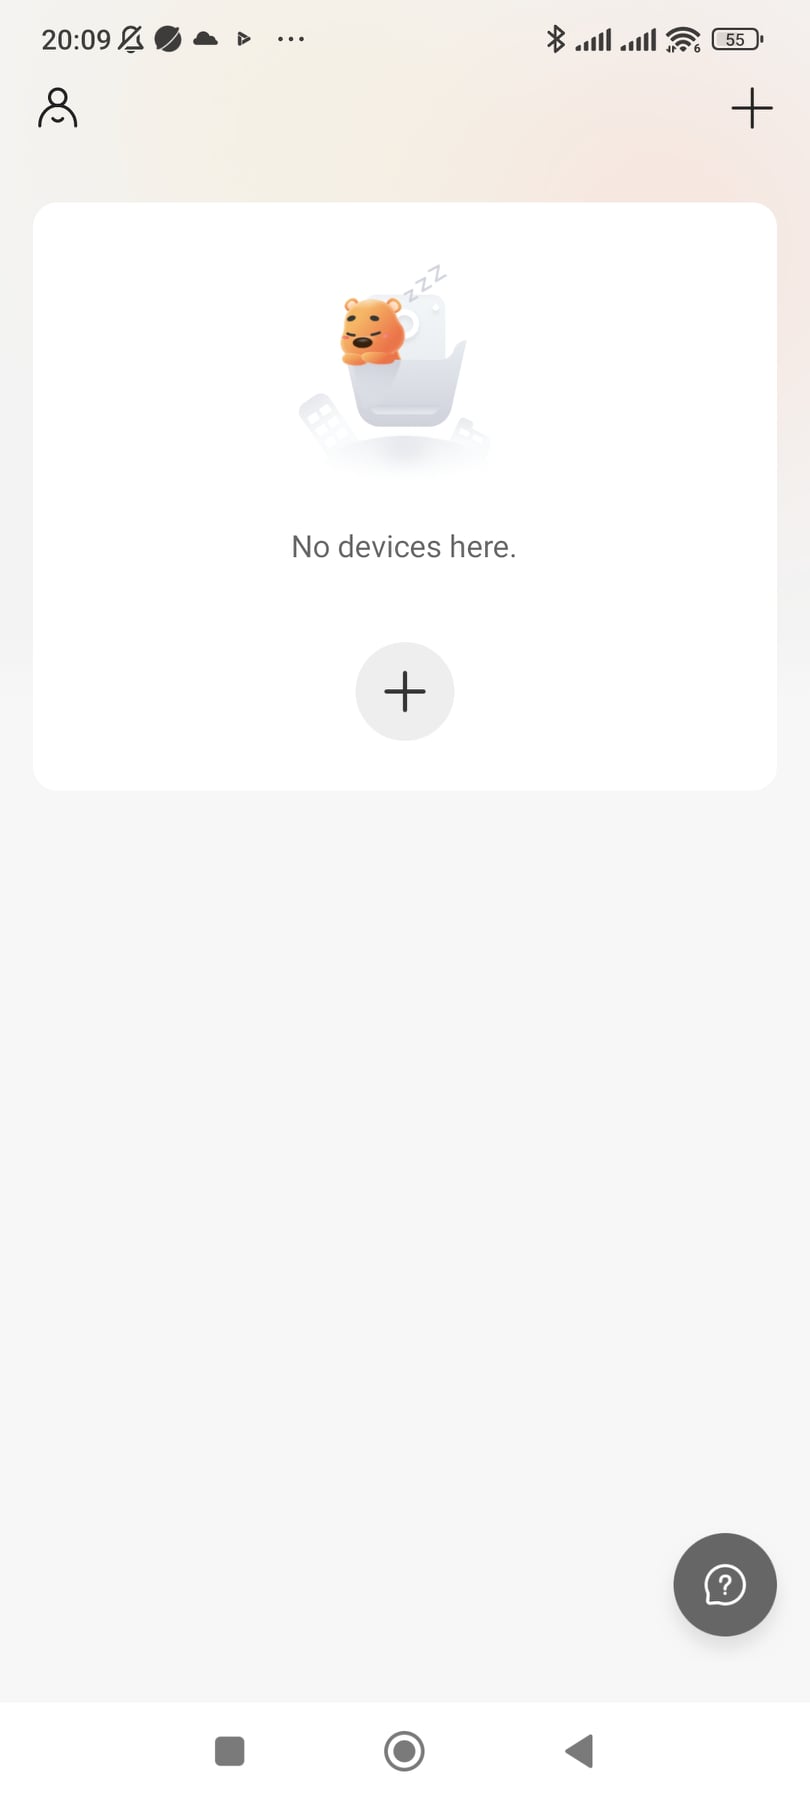


Next comes connecting to the camera’s WiFi hotspot. We first had to turn it on manually using the menu, which you access by pressing the down arrow button. The rest of the process happened automatically.


The app then guided us with instructional videos for mounting and connecting the camera. Next is a video check, where you can see whether you installed the camera straight. The app immediately informed us that we didn’t use the hardware kit, so monitoring while the car is parked won’t work.


Also useful was the information about available voice commands, which let us take a photo, record an emergency video, or even take a selfie. We’ll talk about the complete set of voice command options in more detail later.
Image quality and recording
With the default settings, right after you turn the key in the car’s ignition, the camera turns on and starts recording. The video is recorded continuously to the built-in memory, which has 64 GB. There’s no option to use memory cards here.
The default resolution is 1920 x 1080 px at 30 fps, but we can also switch it to 60 fps. No other resolutions are available. As for image quality, it’s very good. During the day, everything is clearly visible, including car license plates. The image is slightly artificially sharpened, which makes it feel a bit unnatural, but it’s a dash cam, not a camera for filming family videos. For that purpose, the image is excellent.
In the video, the brand logo with the camera model is shown, along with the current speed, GPS coordinates, date, and time. In the app, we can switch to a more impressive display with a few extra details, but they only appear while playing the video in the app. However, we once noticed that the GPS coordinates were missing from the video for an unknown reason.
Since we tested the camera in early April, when the weather changed day by day, our videos captured probably every kind of weather — sunny, cloudy, rainy, and even snowfall. That way you can easily compare image quality under different conditions.
Display and user interactions
The 70mai Dash Cam Omni has a small 1.2″ display. It’s an IPS display with a resolution of 240 x 240 px. It shows the recorded video or various emotions of the brand mascot called MaiX. However, the display reflects quite a lot, which makes it harder to see.
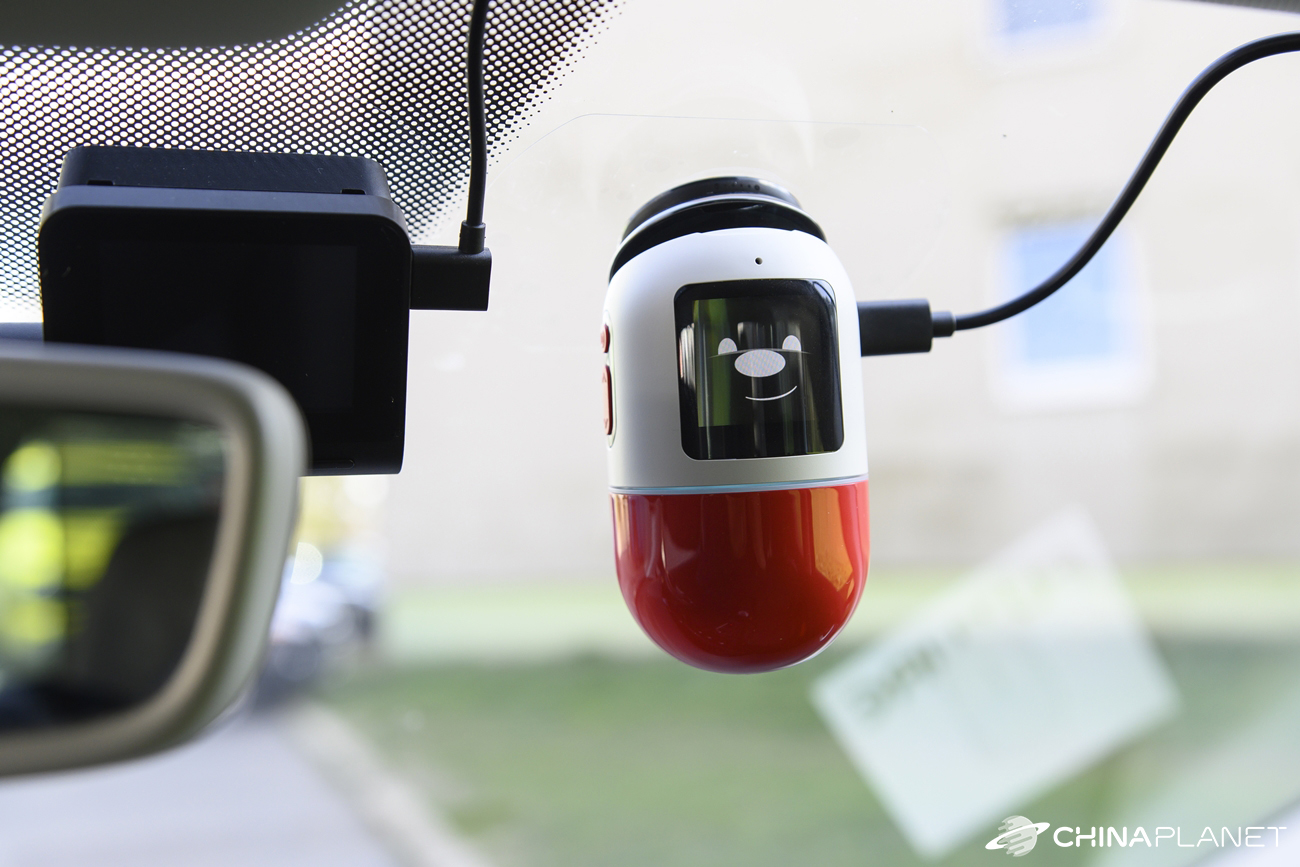
MaiX is a bear, and his simplified cartoon-like depiction can be seen on the camera display quite often. When you turn the camera on and off, it waves at you, can make you smile, or show a thumbs up. It’s an interesting touch, but we could do without it. Still, it at least cheers up the kids.

The interactions are also supported by a backlit color strip around the camera’s edges, whose color signals different actions such as loading, an error, or successful completion of the operation.
Voice commands
As we mentioned in one of the previous chapters, the camera can respond to some voice prompts. They are fixed and specific to the following actions:
- shoot left – turns the camera to the left and records a short video (9 seconds)
- shoot right – turns the camera to the right and records a short video
- take a photo – takes a photo
- shoot emergency video – records an emergency video
- take selfie – turns toward the inside and takes a photo
- shoot vlog – records a short video while slowly rotating around its axis
- shoot inside – turns toward the inside of the vehicle and starts recording video
- stop audio – turns off audio in the video
- record audio – turns on audio in the video
- disable hotspot – turns off the WiFi hotspot
- enable hotspot – turns on the WiFi hotspot
The camera responds to voice commands very reliably and quickly. Even though they’re only in English, using them is quite effective. It’s worth noting that most of these actions can’t be done any other way than via voice prompts. This applies especially to recording short videos.
ADAS system
Many of you probably know the ADAS (Advanced Driver Assistance System) assistance system well, which helps drivers by warning them about various risks. You simply activate it in the app.
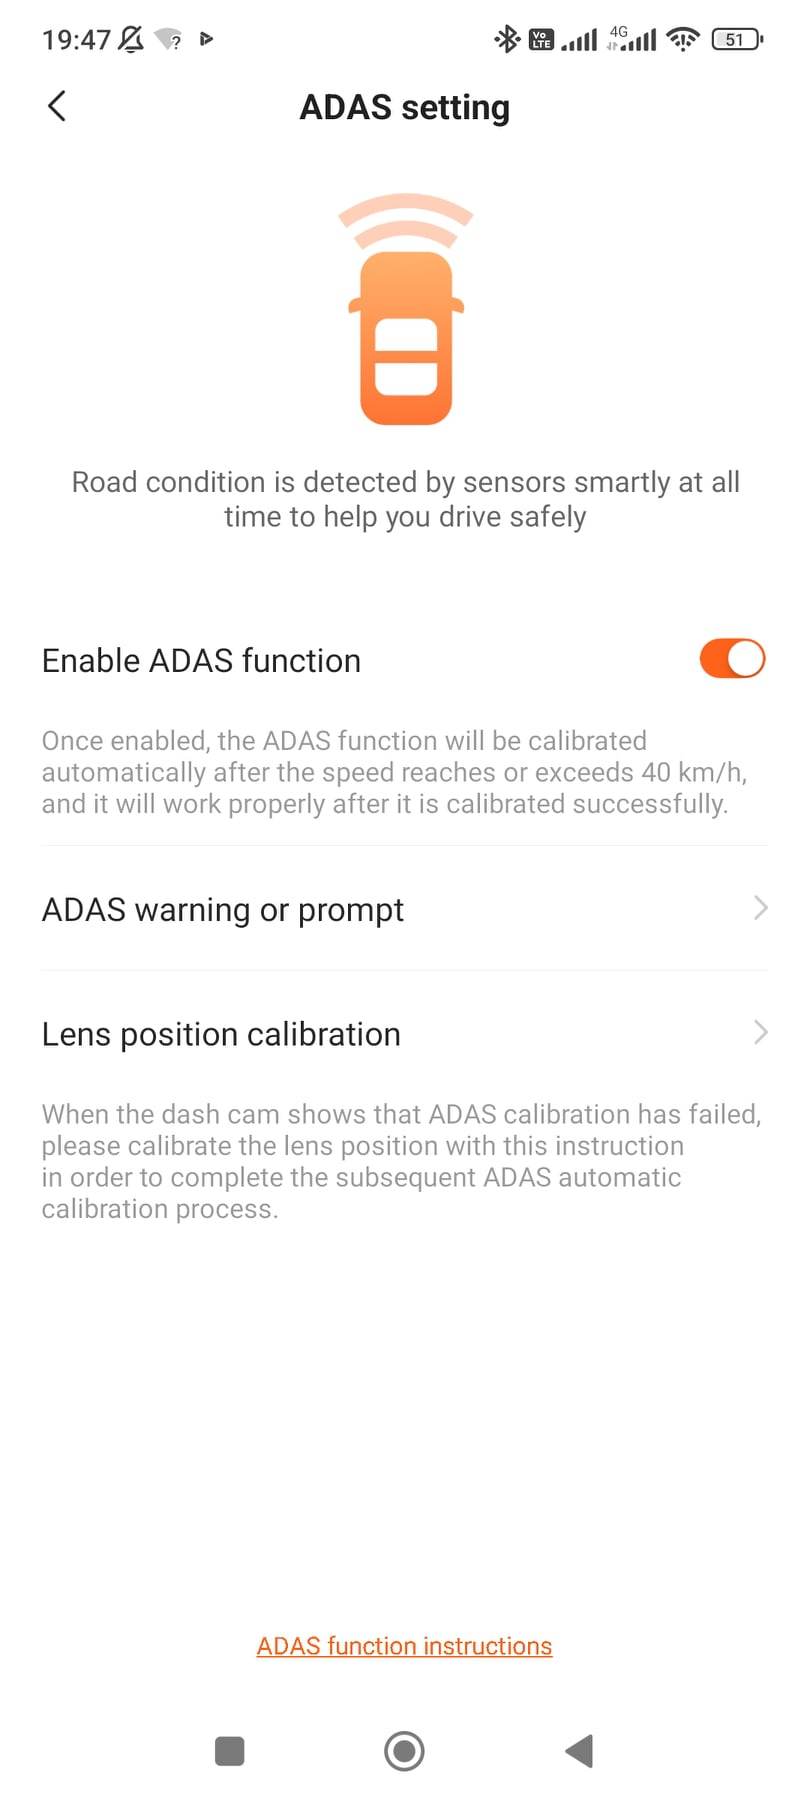
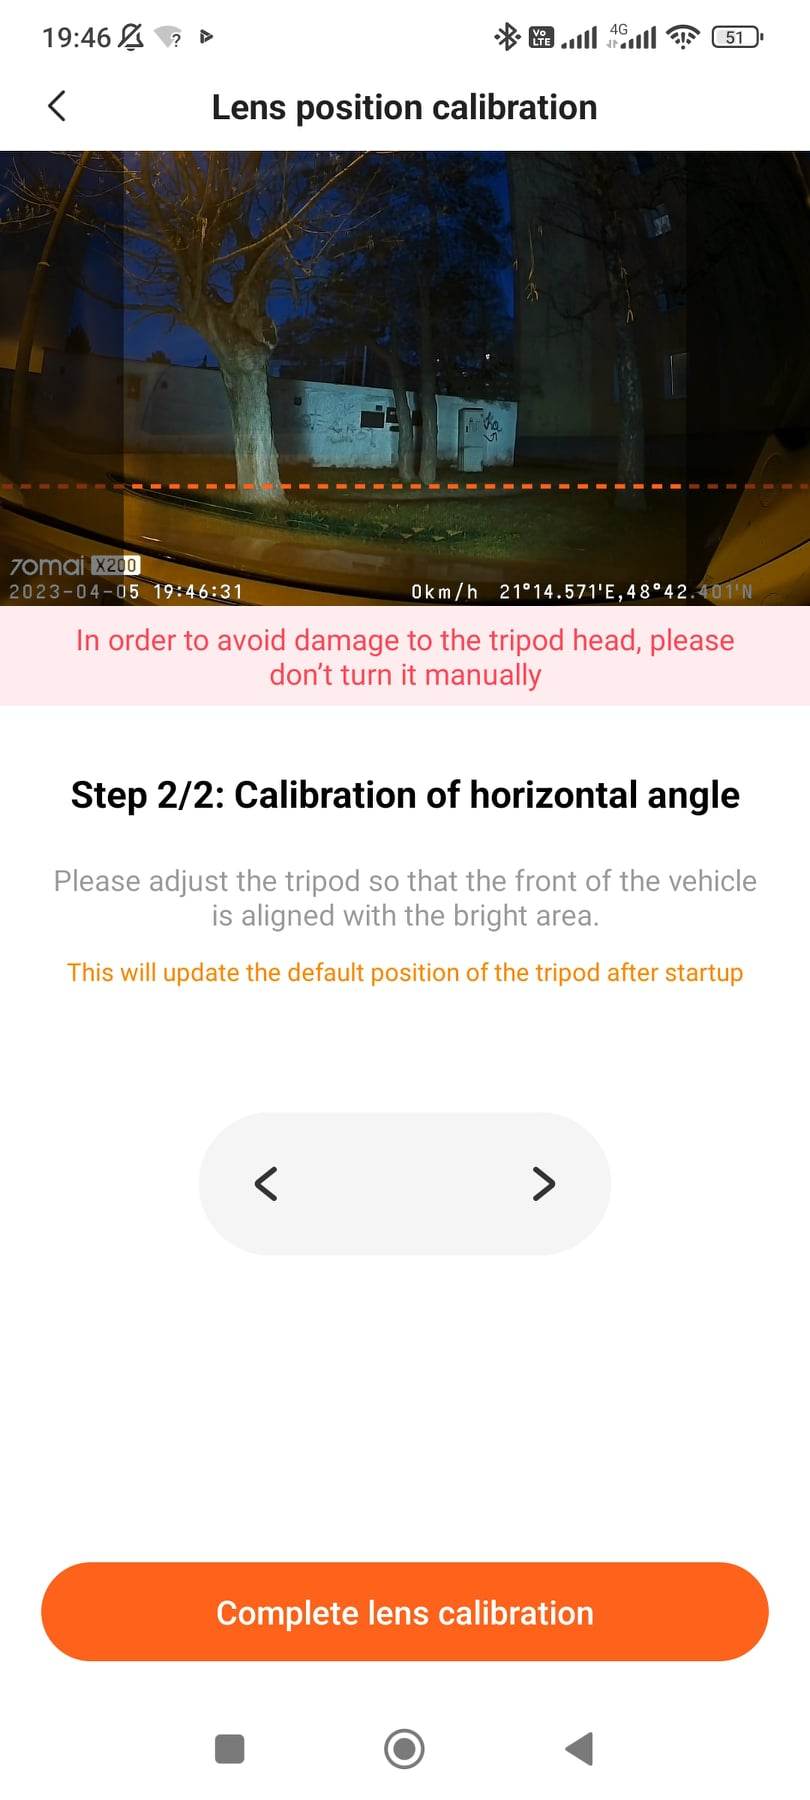

Next, the camera asks you to set it correctly according to the horizontal line that appears on its display. This line should match the front edge of your car’s hood. We weren’t able to tilt the camera so that the hood is perfectly parallel to this line, and maybe that’s exactly why the calibration took quite a long time.

Calibration runs automatically at speeds above 40 km/h. We drove at that speed many times, and the camera kept telling us that the ADAS system needed calibration, repeatedly asking us to drive over 40 km/h. After a few attempts, the calibration succeeded, and the ADAS system activated.
The system mainly warned us about vehicles in front of us that we were closing in on faster, pedestrians in front of the vehicle, or occasionally even about swerving out of the lane. Honestly, though, we have to say this system brought us no added value. The warnings about the car in front or pedestrians crossing at the crosswalk are pretty unnecessary.
The camera in front of us, though, warned us rather randomly when we approached the car ahead. It warned us about pedestrians when we were already almost stopped at the crosswalk. The selected warnings that we don’t want to receive in connection with the ADAS system can be turned off in the settings.
HW kit and its installation
The mentioned HW kit is required to activate monitoring of the area within the camera’s field of view even during parking, when the engine is off. We can enable these features in the camera settings directly using its buttons. First, however, we need to connect the camera using the HW kit.

It has a USB-C cable on one end and a set of three cables on the other end. They’re labeled as VCC+, ACC, and GND. The red VCC+ cable requires connecting to a 12V power source, which is available even when the ignition is not turned on. The yellow ACC cable connects to a source that activates 12V after turning the key. The black GND is used for grounding and connects to any metal part of the car.
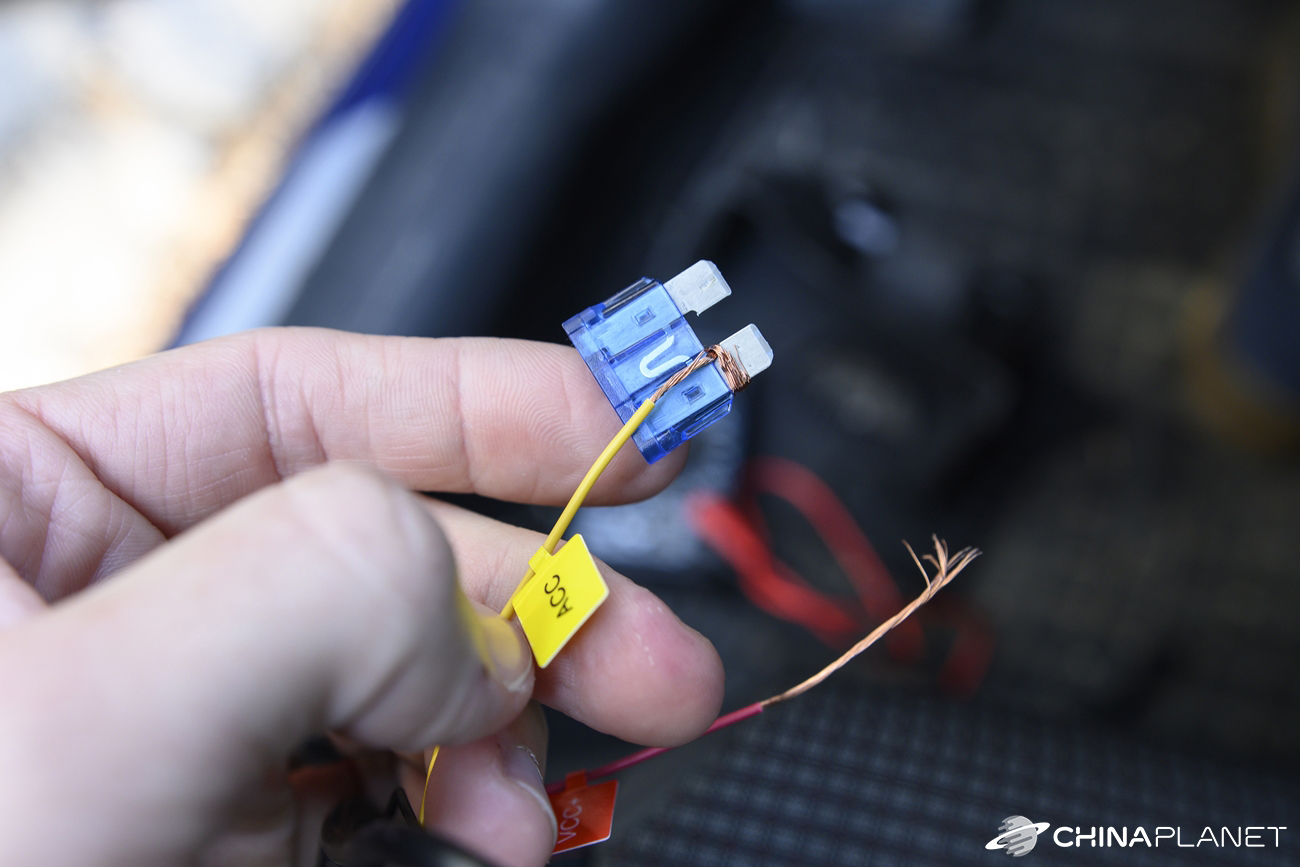
The easiest way is to connect these cables to the fuses. You can find a detailed video on how to do it below:
https://youtu.be/bj1pymYvLuw
For measuring, we used a multimeter, with which we identified the fuses to which we then connected the cables. Only after the correct connection did the camera allow us to activate the mentioned features. But there is also a nicer wiring solution using a so-called fuse adapter, which is then connected to one of the available slots.

Let’s also mention that you can buy a 4G kit as well. It unlocks even more very interesting features such as live transmission monitoring, app alerts, vehicle location functionality, and cloud storage.
Monitoring the area around the car
Unfortunately, monitoring during parking doesn’t work the best. Over the course of a few days, and with various attempts to trigger a recording of movement around the car, the camera recorded only a handful of videos—mostly only when we were getting into or out of the car. For comparison, 70mai Dash Cam Pro recorded dozens of videos during parking under the same high intensity.
However, if the 70mai Dash Cam Omni detects any event while parked, it immediately starts rotating around its axis. And that’s a huge advantage of a rotating camera. In the footage, we can clearly see everything happening around the car—not just what’s in front of the vehicle.
We suspect that the last update to version 1.1.32ww may have caused some issues, because after the update the mentioned connection between the camera and the smartphone started dropping.
Another interesting feature that we can use after connecting the HW kit is time-lapse. With time-lapse enabled, the camera creates a time-lapse video throughout the entire parking period.
70mai Dash Cam Omni vs 70mai Dash Cam Pro
As we’ve already mentioned a few times, since we also own an older camera from the same manufacturer—very popular 70mai Dash Cam Pro—we compared the recording quality from both cameras for you.

We’ll keep it brief and clear—right away you can see that the image from the new 70mai Dash Cam Omni is cleaner, with higher contrast, better color rendering, and better dynamic range. Below, you can watch videos from both cameras separately.
The app environment and its reliability
The 70mai app has a fairly simple and well-organized interface. On the home screen, you’ll find your devices—after selecting the 70mai Dash Cam Omni, it shows a live video feed with a few control elements.


There’s manual side-to-side camera rotation using directional buttons, taking a photo, switching to the album, and calibrating the camera. That’s it.

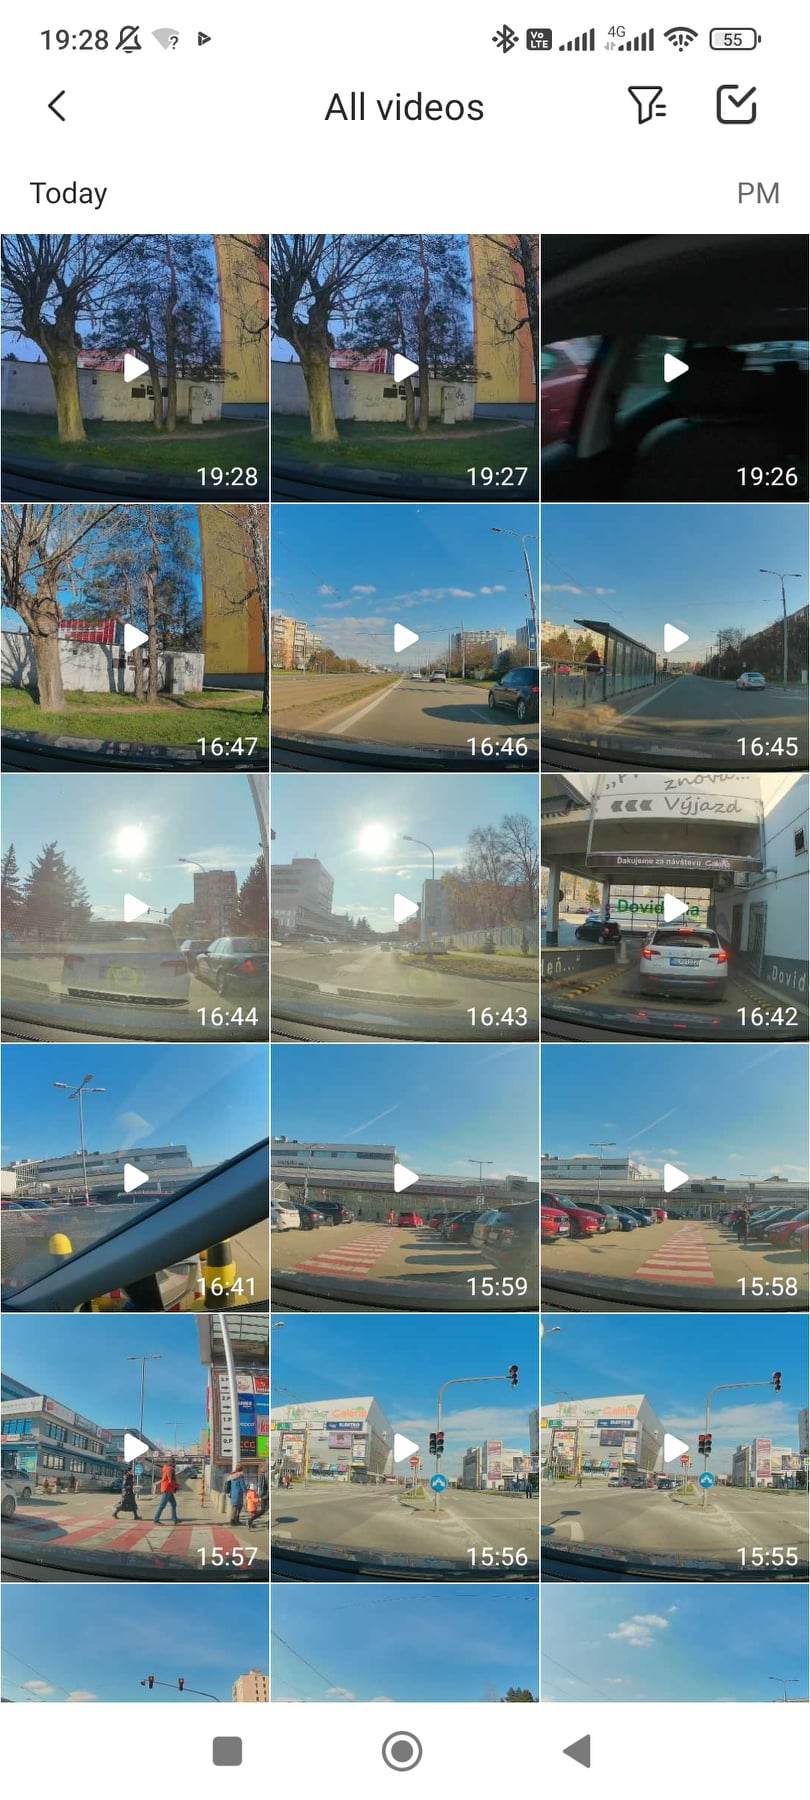
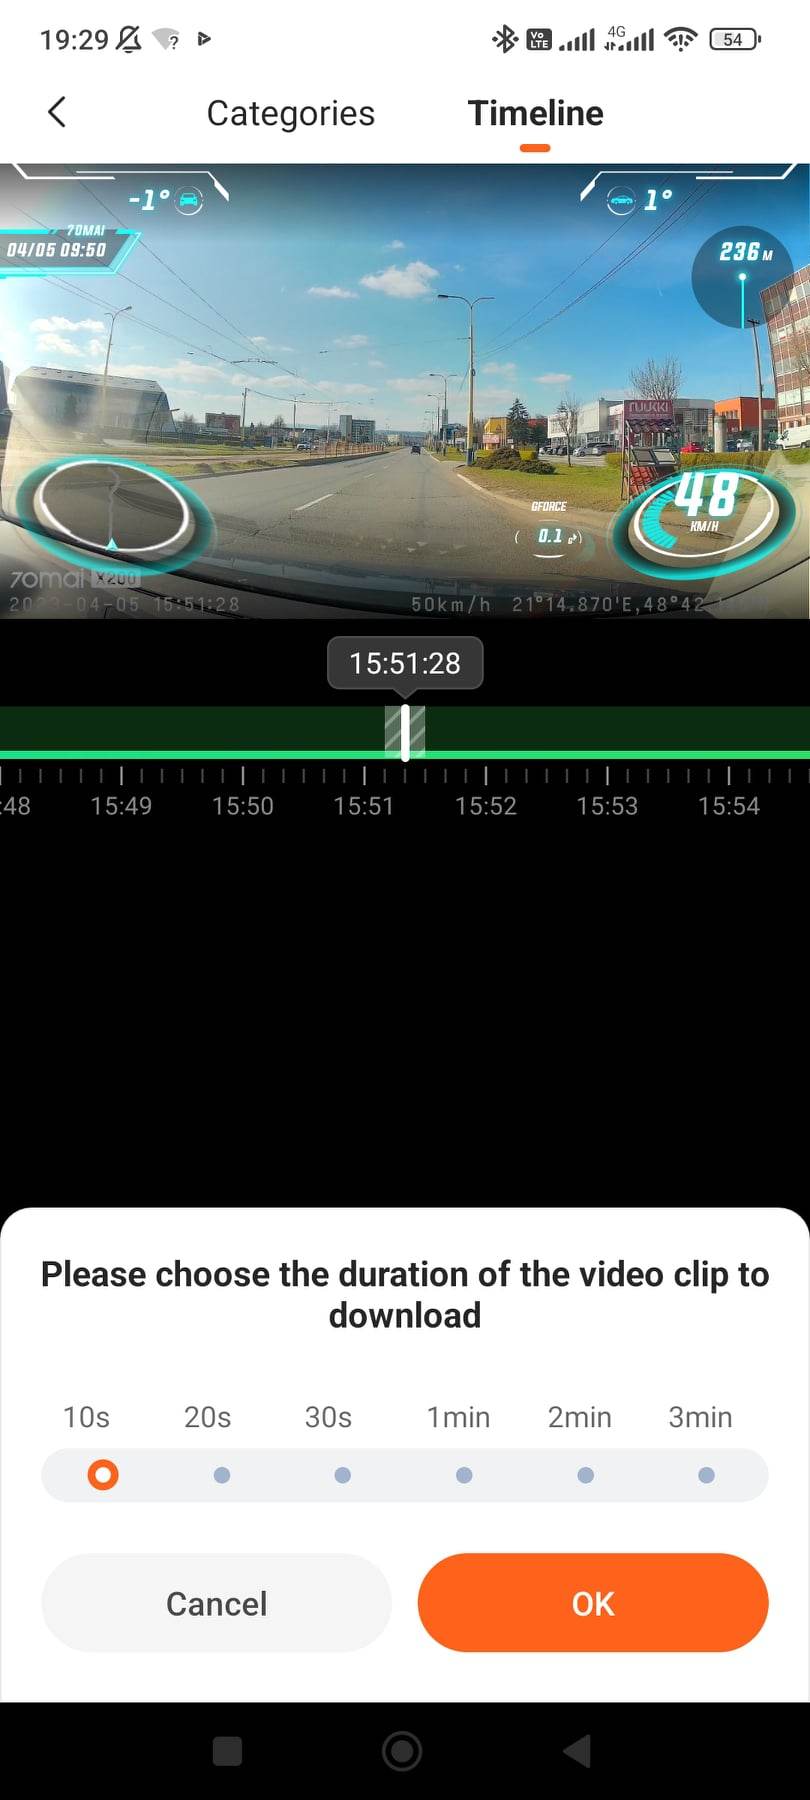
In the album, videos are divided into individual categories. Regular driving videos are always 60 seconds long, and we can download them from the gallery to your smartphone’s memory. There is also a timeline where the individual recording types are marked in color, with the option to download videos in lengths of 10 / 20 / 30 seconds or 1 / 2 / 3 minutes. Downloading takes quite a while, and a 1-minute video is approximately 245 MB.

Unfortunately, the app’s reliability isn’t the best. We often experienced WiFi getting disconnected between the camera and the smartphone while viewing videos or changing settings in the app. On top of that, the app sometimes also had problems loading the initial screen itself.


Settings menu
Settings are available in the app from the screen where we can see our paired devices. Once we choose one of them and switch to the mode where we view the live stream, we can’t access the settings here, which is quite illogical.
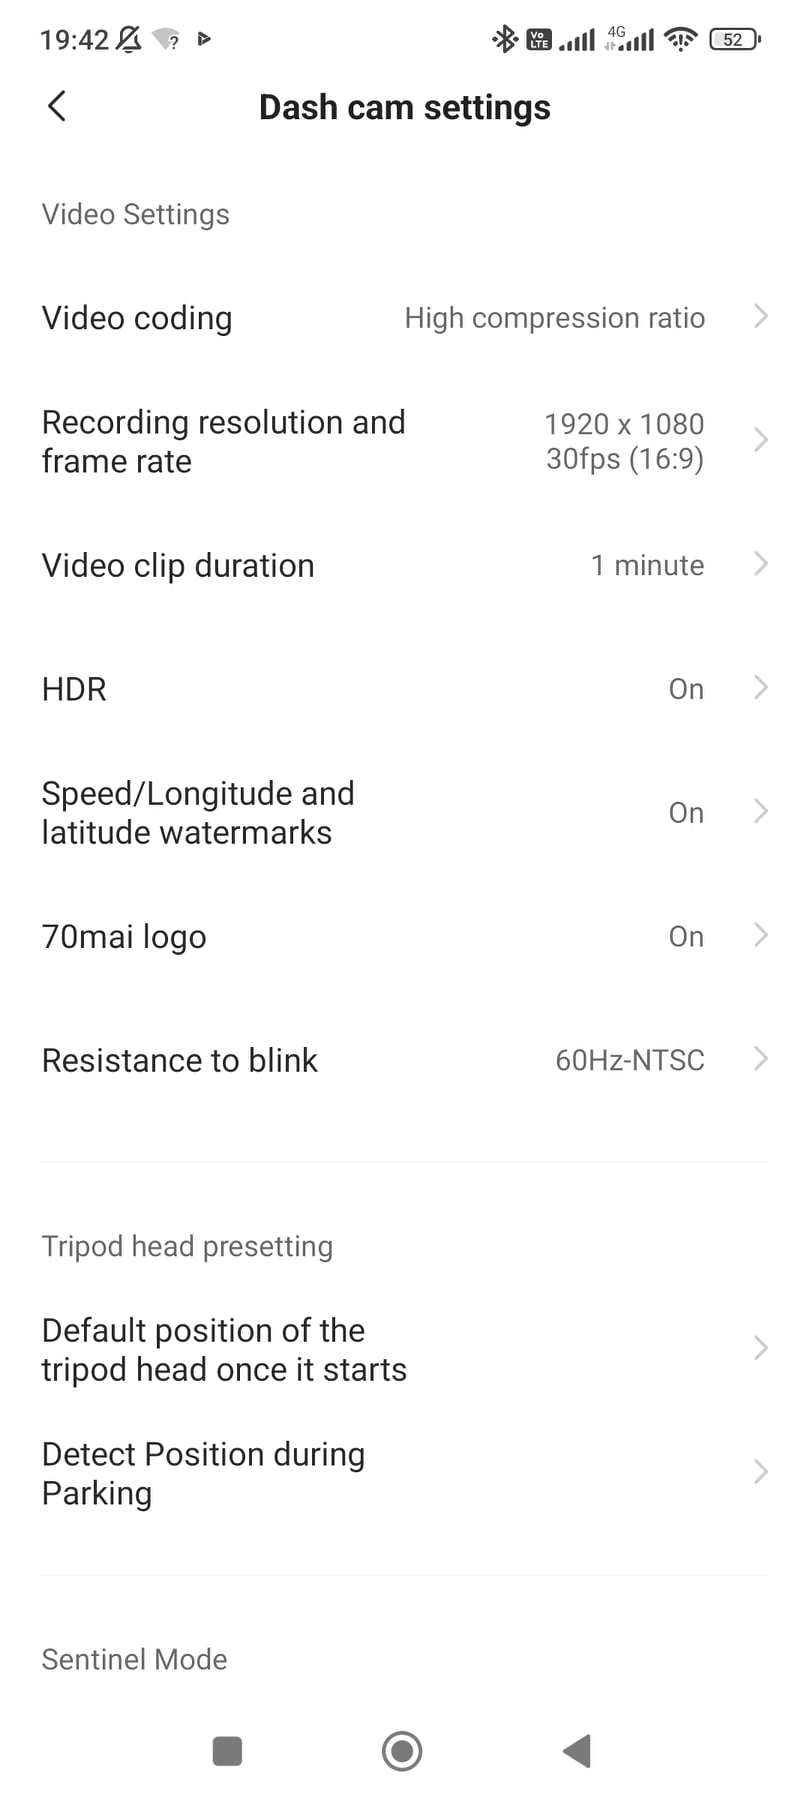


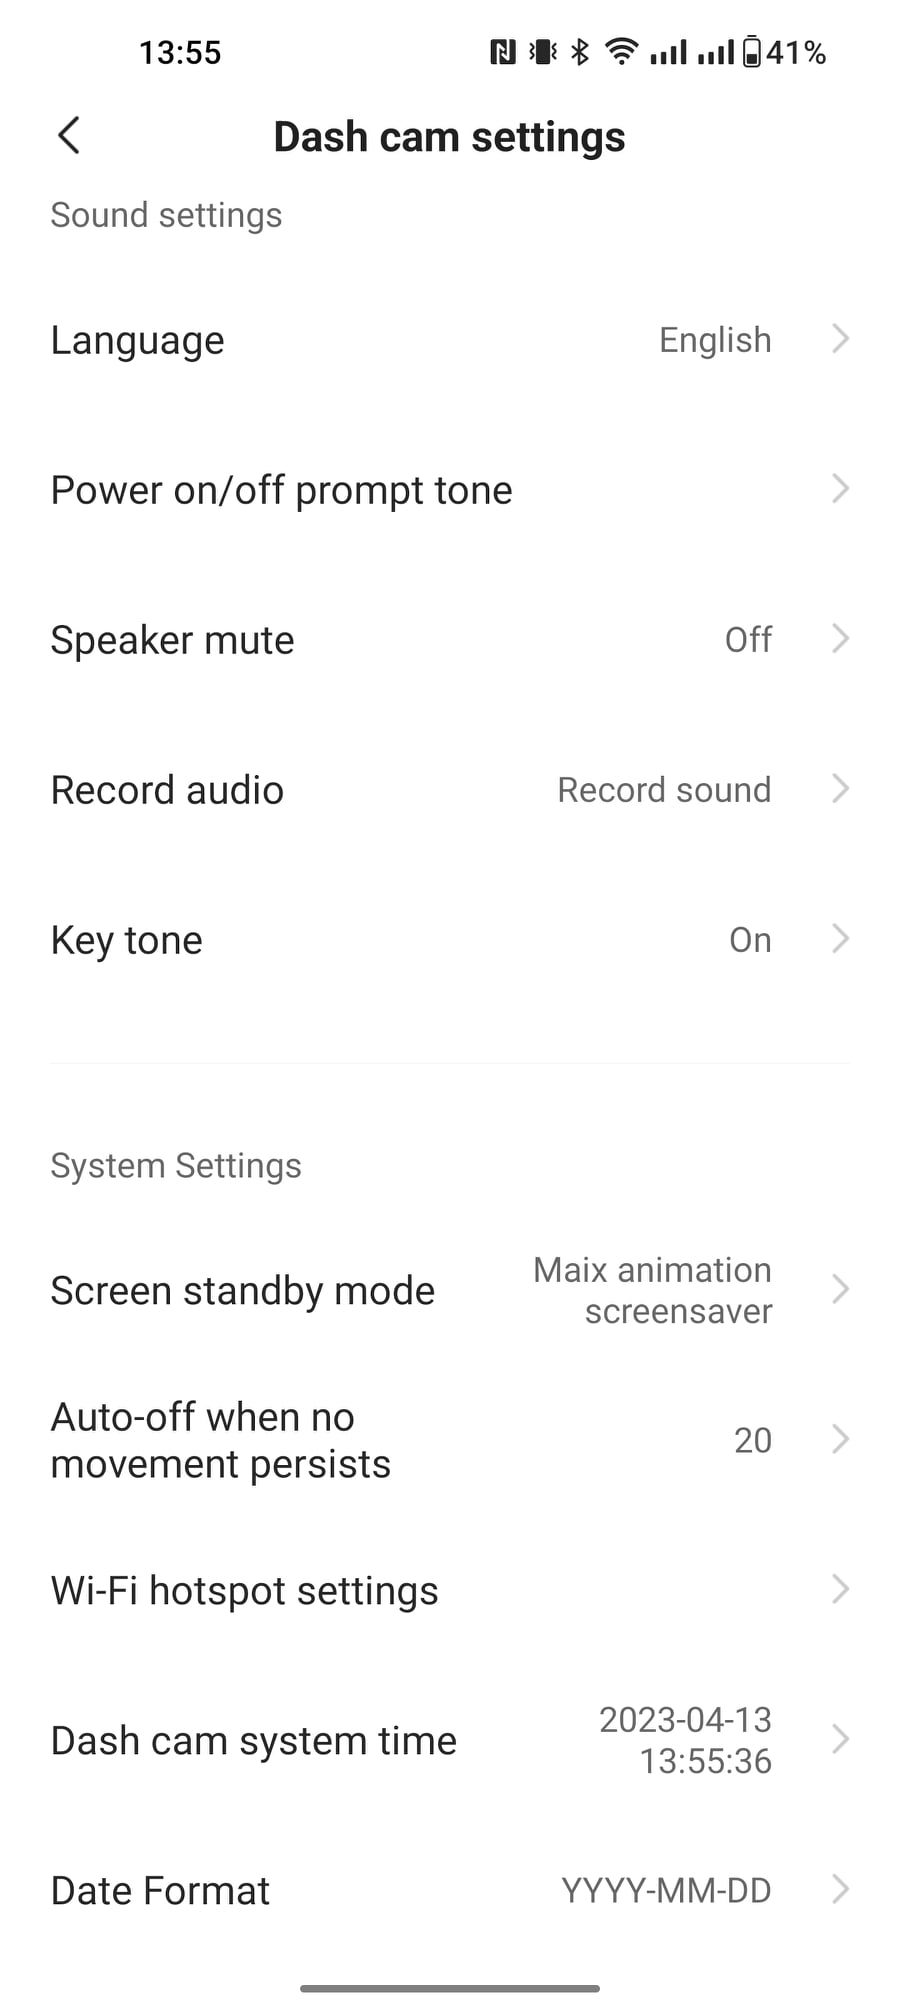
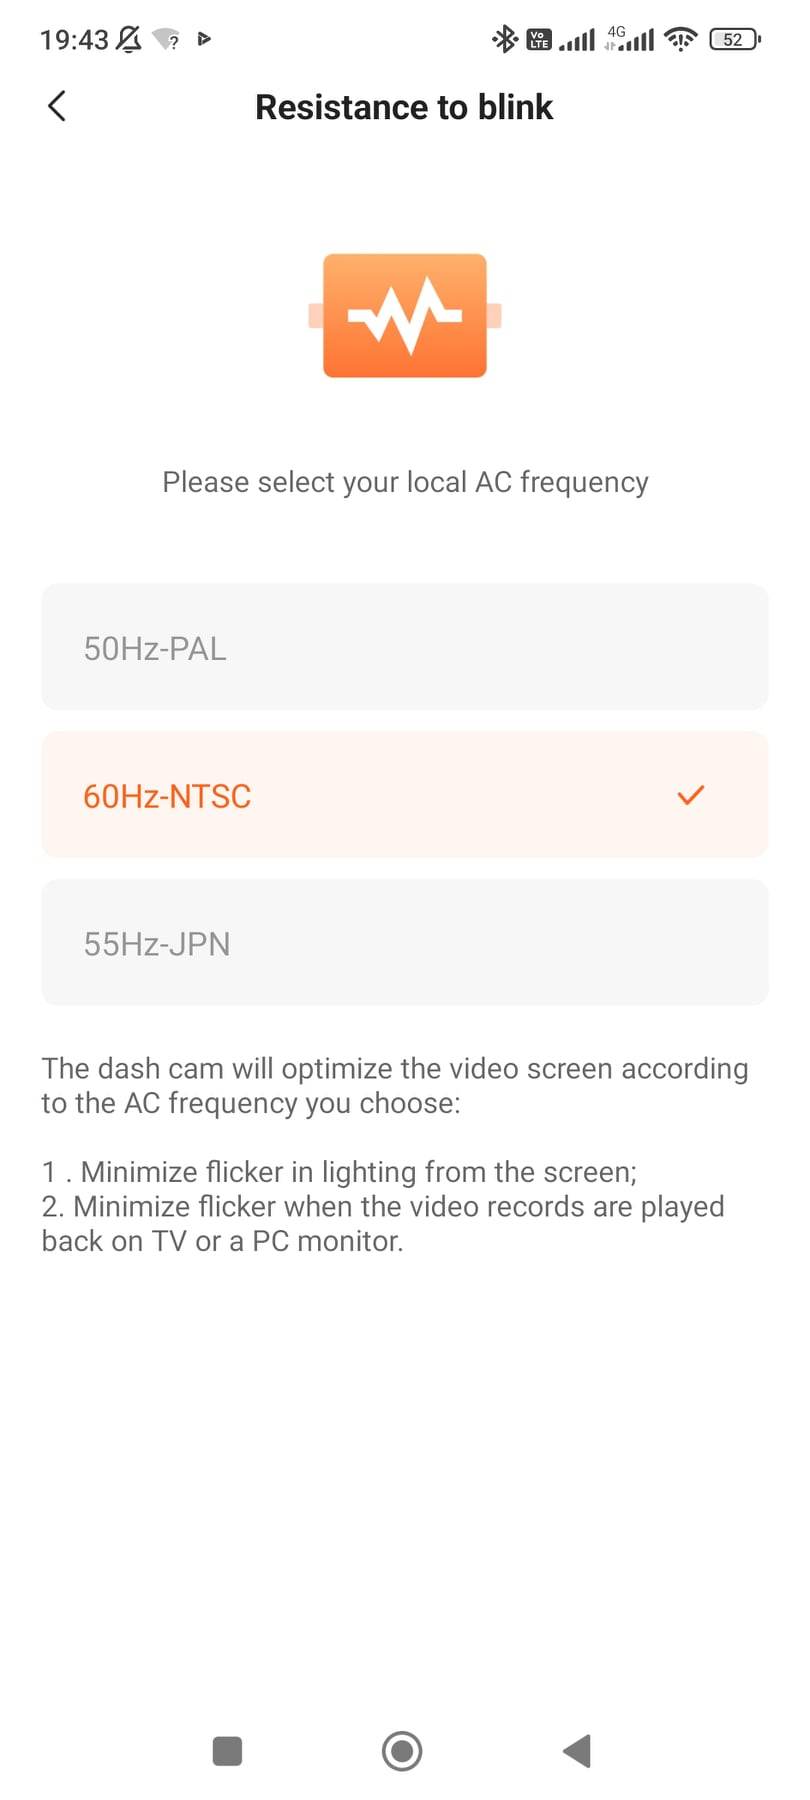
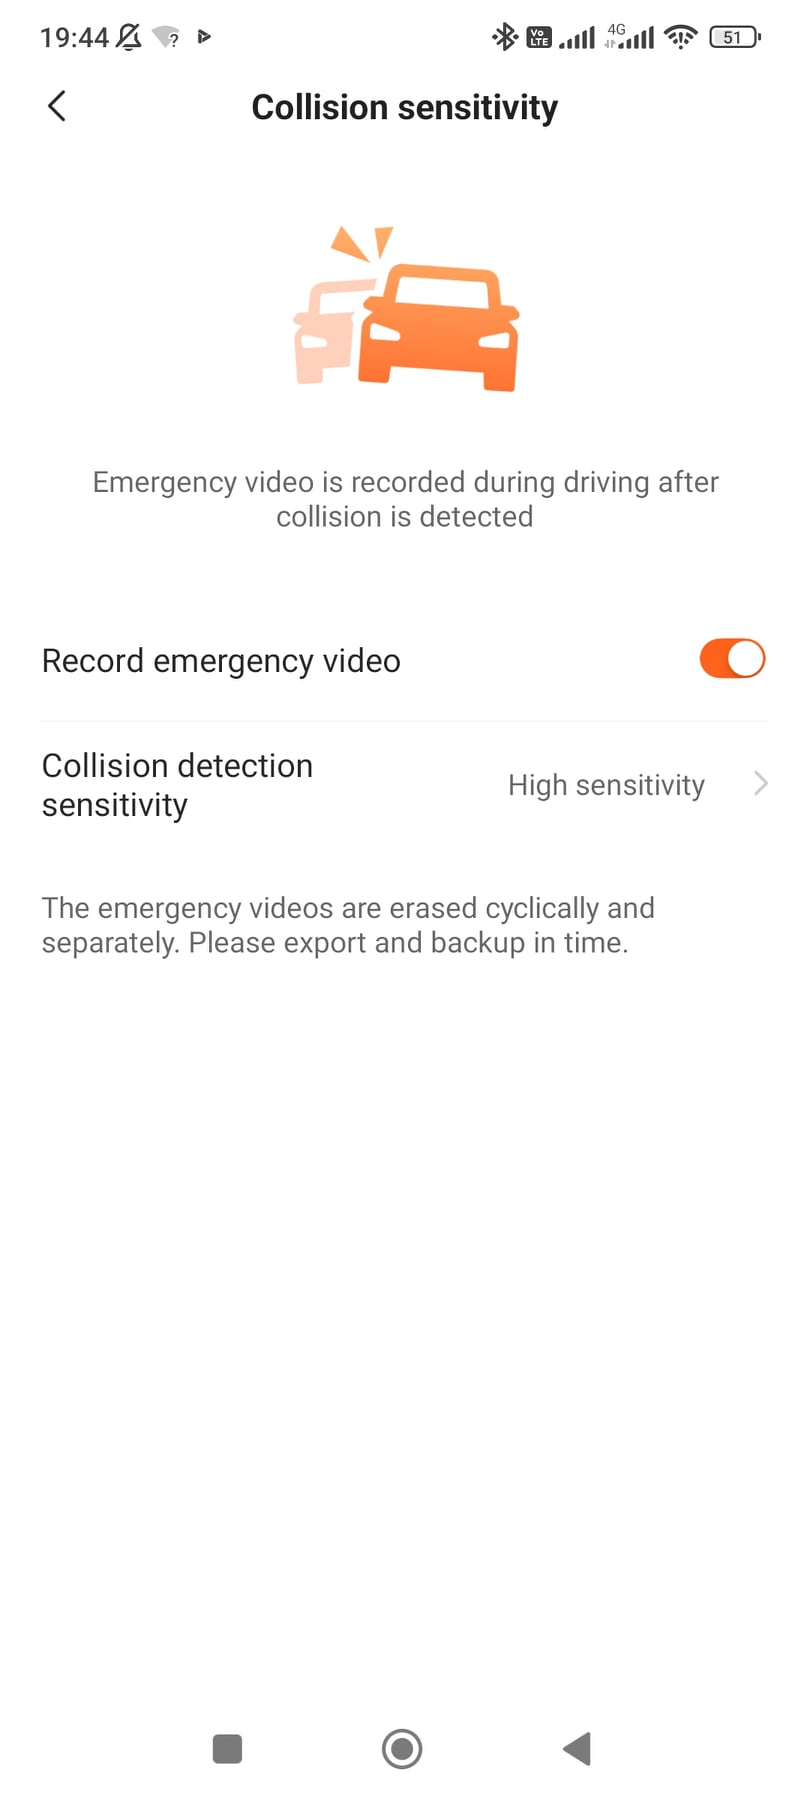
The range of options is quite broad, so we won’t describe everything. Most of it you’ll find in our screenshots, and we’ll only mention the more interesting ones. This includes, for example, enabling the mentioned ADAS system, the WiFi hot-spot, speed units, the date format, or volume.


Resolution settings are also available along with the number of frames per second (1920 x 1080 px at 30 or 60 fps), HDR, or video compression. We can also change the length of individual videos recorded while driving, where the preset value is 1 minute.


70mai Dash Cam Omni: Final assessment
The stylish car camera 70mai Dash Cam Omni X200 is a very interesting and modern new release from the popular 70mai brand. Right at first glance, it stands out thanks to its unusual design with a rotating lens, allowing the camera to capture the entire area around the car as well as the interior. The video is recorded in FullHD at 60 fps, and the image quality is at a very good level.

You’ll also appreciate the voice commands and various interesting features such as recording a vlog, monitoring the area while parking, the ADAS system, or creating so-called timelapse videos from photos.
Unfortunately, the above-mentioned monitoring while parking is somehow not fully fine-tuned. Despite its high sensitivity, the camera records hardly anything happening around it, except for getting in and out of the car. What’s more, the WiFi connection between the camera and the smartphone often drops, so we can only hope the manufacturer will fix these issues with a firmware update.
Don’t miss the best coupons 📩
Subscribe and we’ll email you new coupons before they expire. We only send it once a month — no spam.


Discussion (0)